Verify there is an order, protocol or medical directive to support the collection of blood. Document reason for enacting a medical directive, protocol driven or "nurse to order when" authorization.
Order laboratory tests in electronic health record and obtain labels and follow steps to closed loop laboratory sample collection.
Check labels with patient's armband at bedside to verify patient, test and label is correct.
Blood drawing from indwelling arterial or central venous lines is done through a stopcock with a needleless access device on the sampling port.
After blood sampling, back flush into a vacutainer tube to clear any blood from the line. Dispose of vacutainer in biohazard waste and ensure that the tube is not mixed up with those being sent to lab.
Change the antiseptic luer-lock cap after each access. Draw blood samples through the needleless access device after removing the antiseptic cap. Change the luer-locked needleless access device if it is contaminated or has residual blood after flushing.
Note:
The needleless luer-lock devices reduce the risk for contamination, needlestick injuries and air entry (venous) or blood loss (arterial).
Collection of backflush solution into a disposable blood tube reduces exposure of health care providers to blood products. Back-flushing also reduces potential to introduce pathogens that can occur with forward flushing. Arterial lines are frequently the source for blood stream infection include central line associated blood stream infections.
2.
Obtain Equipment
PPE
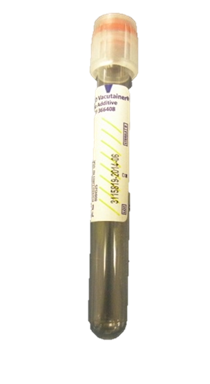
Vacutainer with luer-lock adapter and needle
New antiseptic cap
Blood collection tubes as required for ordered lab tests
Two additional DISCARD blood collection tubes. One will be used to collect the discard sample and the other will be used to collect backflush. Choose a tube that won't be confused with blood samples.
Labels ordered from OneChart
Note: If you are not collecting any blood into vacuum tubes (i.e, blood gases, glucometer samples or point-of-care testing), a syringe can be used to collect the discard sample and to back flush.
3.
Prepare Equipment and Environment
Explain procedure to patient/family.
Assemble vacutainer with access needle, sample tubes and/or blood gas syringe
Press the alarm silence to reduce nuisance alarms during blood sampling.
Blood sampling from an arterial line reduces patient discomfort from needle sticks, however, patients should be advised that they may feel a warm sensation in their extremity during line flushing.
4.
Connect Blood Drawing System
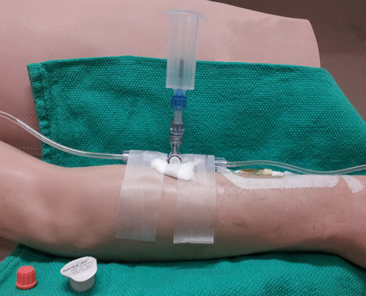
Remove antiseptic. If no access cap present, scrub the hub for 15 seconds with 70% alcohol and 2% chlorhexidine swab. Wait 30 seconds dry time before accessing the port.
The Centre for Disease Control (CDC) recommends 70% alcohol or an or an iodophor for cleansing injection sites. Chlorhexidine adheres to surfaces to provide prolonged antimicrobial properties.
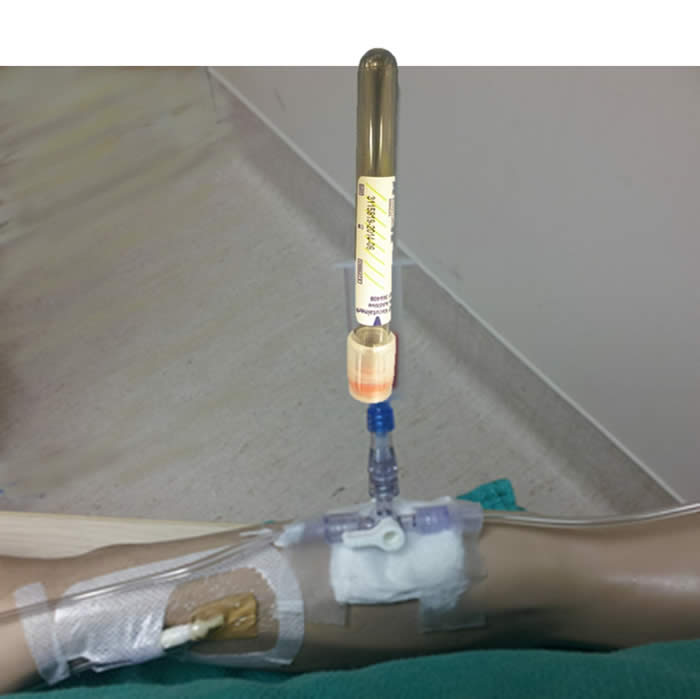
2. Connect vacutainer with sampling needle to luer-lock sampling port as shown in Figure 1.01.
3. Begin with 3-way stopcock positioned with prong toward the sampling port (this is off to sampling port).
Figure: 1.01 Stopcock off to sampling port with vacutainer connected.
5.
Collect Discard Sample (Artrial Lines)
Insert one of the DISCARD tubes into the vacutainer. Be careful to use tubes that will not be confused with actual blood samples.
Depress the blood tube to activate the vacuum.
Open up the flow of blood by turning the stopcock 90 degrees toward the flush system. This is open the circuit between the patient and sampling port.
Allow a minimum of 3 mL discard to be drawn from the arterial line.
Turn the stopcock to 45 degrees when changing tubes to release the vacuum and prevent contamination of samples from infusion fluid.
After the last sample has been drawn, connect the second discard tube to the vacutainer. Turn the stopcock off to the vacutainer. Pull the flush device to clear all blood from the patient's catheter.
Turn the stopcock off to the patient catheter. Activate the vacuum on the discard tube and pull the flush device until all blood has been cleared from the stopcock.
Turn the stopcock off to the vacutainer. Remove vacutainer and discard tube and dispose in a biohazardous sharps container.
Note: If you are not collecting any blood tubes, you can collect discard sample into an extra syringe.
6.
Collect Discard Sample (Venous Samples)
Assess all IVs that are running distal to the catheter during sampling.
All IVs that are running into any lumen of a multilumen or PICC catheter (including an introducer) must be off during blood sampling (except for blood gases). This cannot be done if the patient is receiving vasopressors.
A minimum discard sample of 5 ml is required when drawing blood samples from central venous lines due to longer lumen volume.
Do not draw blood samples from peripheral IVs, due to high risk for hemolysis.
Infusions from distal peripheral lines or from any other port of a multilumen PICC or temporary venous catheter can dilute or contaminate a lab sample. These IVs should be turned off prior to sampling. If an infusion cannot be safely stopped during blood sampling, an alternative method for blood sampling is recommended (venipuncture, arterial line).
Consider IV contamination for any patient with unusual electrolyte or lab values. TPN can significantly contaminate blood samples.
7.
Collect Blood Samples to Prevent Dilution or Contamination with IV Fluids or Vacuum Tube Contents
Order of Draw
When drawing blood from an indwelling line, collect the INR/PTT sample FIRST after the discard sample. It should be drawn before blood gases (which is a heparinized syringe).
Although we do not routinely heparinize our hemodynamic circuits, any PTT drawn from a heparinized line should be drawn after at least a 5 ml discard.
The recommended order of blood tube collection is shown in Figure 1.03.
Figure 1.03: Recommended order of draw. When drawing from indwelling line, adjustments may need to be made if sample is drawn from a heparinized line or blood gases are being collected.
Position Stopcock to 45 Degrees Between All Samples/Tube Changes
Turn the white stopcock to a position half-way between the patient line and the sampling port (at 45-degree position) between each tube change. This position ensures that the stopcock is off in all directions and prevents any flow of flush fluid or IV solution into the sample tubes.
Turn the stopcock to 45-degrees before removing the tube from the vacutainer to prevent back splash of blood when the vacuum is released.
Do not turn the stopcock directly toward the sampling port during blood sampling (this would leave the circuit open between the flush and the patient). This position can allow saline from the flush system to contaminate the sample.
Ifyou are drawing blood from a heparinized line (saline without heparin is our standard setup), draw the blue top tubes for INR/PTT last, but BEFORE blood gas sample.
When all of the desired specimens have been collected, turn the white prong on the stopcock toward the sampling port at 90 degrees (open to the patient and flush system).
Pull the flush device located below the transducer to activate the fast flush mechanism.
Flush until there is no visible evidence of blood.
Evaluate the waveform to ensure it has been restored.
9.
Backflush the Stopcock
Connect the second extra syringe or blood tube to the sampling port.
Turn the stopcock so that the white prong points toward the patient's catheter. This is open between the flush and discard syringe.
Activate the flush device and back flush saline into the DISCARD tube or syringe.
Ensure all blood is cleared from the needleless access device.
Replace the needleless access device if residual blood remains after flushing
Connect a new luer-lock antiseptic cap on the needleless access port.
Remove non-sterile gloves, perform hand hygiene.
Figure 1.04: Position of stopcock to backflush the stopcock.
10.
Label Specimens
Place labels on specimens at the bedside.
Verify that the label name and patient are correct.
Send blood samples to the lab in a biohazardous bag.
11.
Document
Document the reason that the sample was drawn if collected as part of a PRN protocol or medical directive.
Monitor for results to be posted.
Review significant findings with provider and document discussion/plan in the Electronic Health Record. Significant findings include abnormal results, return to normal following treatment or normal results that may rule out issues of concern.