Step 1:
Choose a clean, dry, well-lit work area and lay out the following supplies:
- Syringe containing factor concentrate connected to butterfly needle primed to remove all air in the tubing
- Extra butterfly needle
- Alcohol wipes
- Gauze or cotton ball
- Tourniquet
- Tape (optional)
Step 2:
Wash hands, under nails and forearms.
- Use warm running water
- Use antibacterial soap from pump dispenser
- Dry hands with a paper towel
- Turn off taps with paper towel and discard
Step 3:
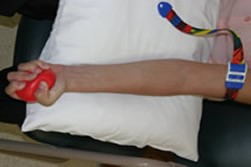
Find a vein that is smooth, straight and easy to feel at the bend of the elbow, forearm or hand. (The vein may not be easily seen but can be felt). Making a fist and releasing it (pumping action) may help make the vein increase in size and become more obvious. Apply the tourniquet 7-15 cm (3-6²) above the chosen needle site. It should be tight enough to restrict surface venous flow but not too tight to restrict circulation in the deeper arteries.
Step 4:
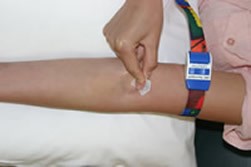
Clean the skin over the selected site with an alcohol swab using a firm upward stroke. Let it dry.
Step 5:
Hold the wings of the butterfly needle together between your thumb and index finger. Remove the plastic protective cap. Make sure that the bevel (the open part) is up.
Step 6:
Remove protective cover from butterfly needle.
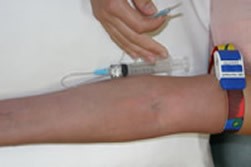
Step 7:
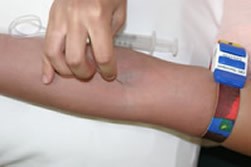
The vein you are trying to puncture may roll away from the pressure of the needle. Using your middle or ring finger pull the skin taut to anchor the vein. Holding the butterfly with your thumb and index finger. Puncture through the skin with one quick movement at a 30 degree angle. Once through the skin, angle the needle to about 15-20 degrees and slide it into the vein—you should feel a “give” or a “pop”. Blood should be seen where the tubing connects to the needle. The needle does not need to be pushed all the way to the wings. Secure butterfly with tape (optional).
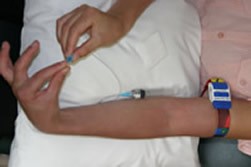
Step 8:
Check that the needle is in a good position by gently pulling back on the plunger of the syringe; if blood comes back into the tubing you are ready to begin infusing.
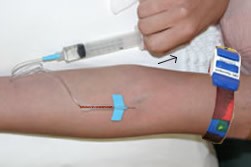
Step 9:
Release tourniquet.
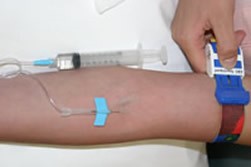
Step 10:

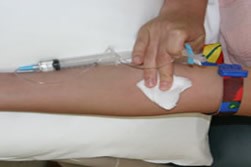
With your thumb on the end of the plunger, slowly push in the mixed factor solution with smooth steady pressure at the prescribed rate.
Step 11:
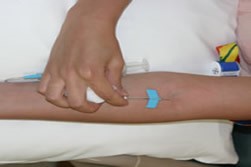
When the factor treatment is finished, remove the butterfly needle and apply pressure with a dry gauze or cotton ball for a minimum of 2 uninterrupted minutes (no peaking).
Step 12:
Put on a bandage
Step 13:
Put all the needles into the sharps container. Bottles and syringes can go in the household garbage.
Step 14:
Observe for signs of allergic reaction and complete the Infusion Diary.


